Call us+8618927451629 cononmk@cononmk.com

ReturnCurrent location:Home / News / Industry news
Author:Shenzhen Cononmark Photographic Equipment Co., Ltd.issuing time:2017-12-14 16:43:11Views:2356【SML】
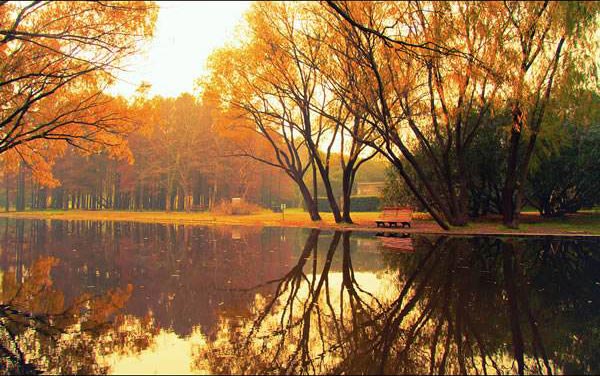
For a long time, landscape photography has been focusing on the beauty of natural scenery, such as nature photography and urban architecture photography. In general, landscape photography is an important topic in diverse photography.
For novices, landscape photography may occupy most of the photo gallery, if even the static landscape photos are not good, it will greatly affect the confidence and motivation to learn photography, landscape photography, you need to learn what Tricks?
First、A SLR camera to manual mode
Under normal circumstances, we are accustomed to the aperture priority and shutter priority mode, and sometimes to switch to manual mode, then many people will feel trouble, but the manual mode of handling and creativity definitely make you no regrets. Manual mode shooting scenery, you can freely adjust the exposure, of course, this is to be adjusted according to your shooting effect, which is an important exposure setting reference.
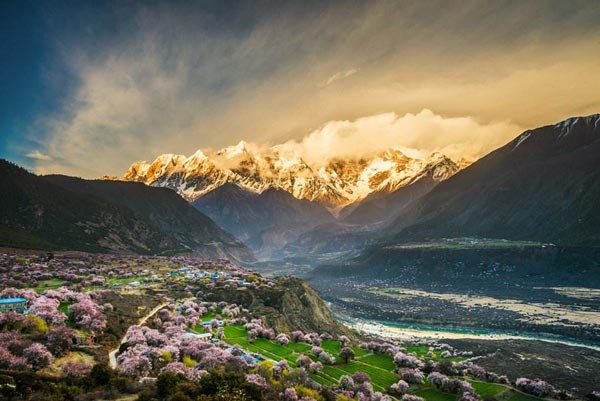
If you want to talk about the aperture adjustment settings, a good idea is to preserve the image of the first high-quality, while not ignoring the luminosity. Different from the aperture priority mode, in manual mode we need to constantly change the exposure settings, so as to achieve our shooting results. If it is in the early morning and half an hour before the evening shooting scenery, then shot the works feel quite dreamy and beautiful.
Second, the need for landscape photography before the composition
Usually in low light conditions, the shooting requires multiple shooting attempts, it is good for a long time exposure, so as to achieve more results. Therefore, the time required for the shooting process is generally longer, so preparation is required before shooting.
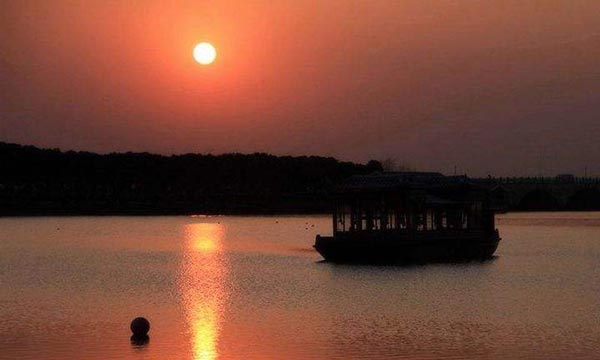
When photographing the sunset or the night view, you must arrive at the site an hour or two before sunset to prepare the photographic equipment in advance and find the right picture. If you are shooting a starry sky, then you need to find a location that is unaffected by light. After thinking about composition in your heart, the next step is to prepare the lens you want to express what you are thinking.
Thrid. Important photographic equipment camera tripod
Although taking pictures with a camera tripod scenery is more tired, especially when it comes to overpass the mountain is very hard, but this is to be able to shoot high-quality landscape photography. Since the light source is relatively weak after dusk, the exposure time needs to be longer, and depending on the shooting, the shutter may take 1/20 seconds or even up to 30 seconds, 1 minute, 2 minutes. The photographer handheld shooting time is too long, there will be tremor, so that photos blur. So in order to shoot a good photo, to maintain high sharpness, or a little hard to bring the tripod it!
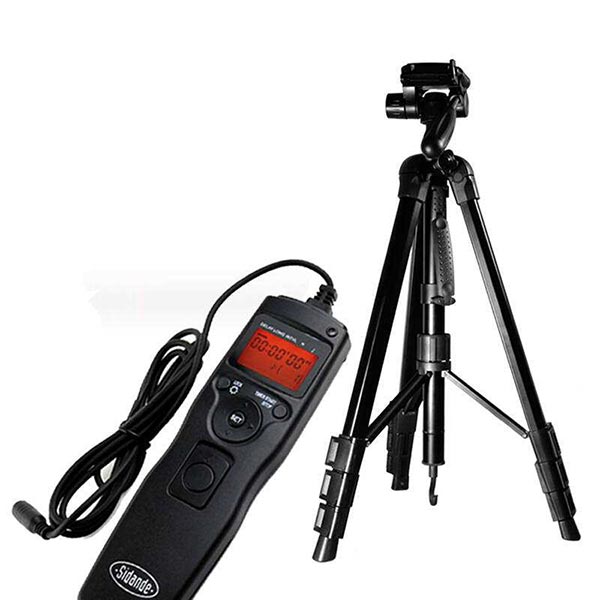
In fact, the camera tripod is also placed skillful, the camera tripod placed in the shooting position, one of the feet aligned your body, then you can stand in the middle of the two tripod. After placement, make sure the stand platform is level.
Fourth, low light focusing skills
If you have photographed the night scene, perhaps also tried to press the shutter when failed to shoot, the main reason is that the camera failed to focus, so they will lock the shooting function, and therefore failed to shoot. So how to shoot in low light?
The easiest way is to use manual focus, the use of electronic viewfinder (EVF) or real-time display of the camera will be more convenient. The camera's screen brightness to open large, composition, placing the tripod stable, and then put the main body in the focus rectangle, and then press the magnify button, then turn the focus ring until you get a sharper screen. To help focus, in the dark can try flashlight to the main body for focus.
Fifth. Bracketing skills
In the same way as focusing around, exposure bracketing ensures the best results by taking the same picture (typically 3 shots) at several different shutter speeds. In the failure to confirm that setting is the right exposure is more easy to use, of course, the exposure is not properly defined, to express their own picture is correct.
Sixth,Avoid shooting camera shake
For a professional photographer, can not afford to have any difference, if in the capture of a precious work, just encountered camera shake, then wait for a long time work will go its own way. If at this time with a remote control or infrared remote control, then you can press the shutter that little vibration to get rid of.
Seventh. Use of high sensitivity (ISO)
With high-sensitivity shooting, the noise is bound to increase, so we have never used it. But in low light, the high sensitivity of the utility place allows us to get enough shutter speed, reduce the equipment or subject due to the image blur caused by blur, but also can be used as a shutter speed to enhance solidification instinct dynamic use.

+8618927451629 24-hour telephone consultation
© 2017 Shenzhen Cononmark Photographic Equipment Co., Ltd.